Showing posts with label Cake. Show all posts

Sunday, December 30, 2012

Pumpkin Gingerbread w Cream Cheese Frosting

I made this on the fly yesterday while I was waiting for my husband Anthony to get home and it was fabulous.  And we're talking best-dessert-of-the-year fabulous.  I have this gingerbread recipe that I love so much but I haven't been able to make anything come close to it since going Paleo.  This finally does it some justice.  With the perfect blend of spices and some added crystallized ginger for an extra bite, this bread almost has the consistency of a brownie.  With or without the added creamy sweetness of a traditional cream cheese frosting, everyone is sure to love this little cake!

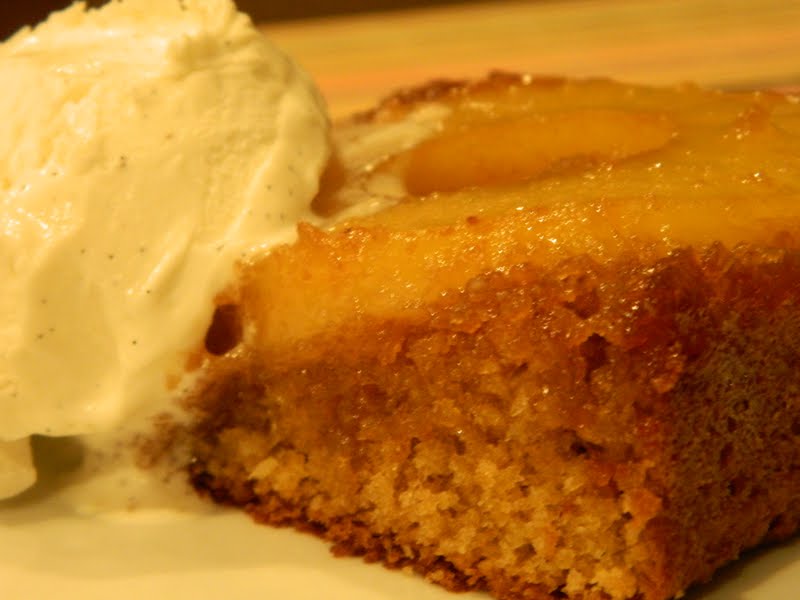
Anthony's new favorite.  Better hurry up and make it before your New Year's diet starts
Ingredients:
1c pumpkin puree (I used Trader Joe's Organic Canned Pumpkin)
1 + 3/4c almond flour
2 large eggs
1 + 1/2tsp baking powder
1/2tsp baking soda
1tsp pure vanilla extract
1tsp ground cinnamon
1 + 1/2tsp ground ginger
1/4tsp ground cloves
1/4tsp salt
1/2c pure molasses
1/4c pure maple syrup
1/4c crystalized ginger, chopped finely

For Frosting:
1/2c butter at room temperature or softened
8oz full fat cream cheese at room temperature or softened
2tsp pure vanilla extract
2tbs heavy cream or full fat coconut milk
3c confectioners sugar
1/2c toasted chopped walnuts (optional)

Directions:
1. Preheat your oven to 350F.  Line an 8x8" baking pan with nonstick foil or parchment and butter it.  Set aside.
2. In a small saucepan, boil molasses and maple syrup.  Remove from heat and cool slightly.
3. In a large bowl, mix pumpkin, almond flour, baking powder, baking soda, vanilla, cinnamon, ginger, cloves, and salt.  Pour in molasses mixture and mix well.
4. Make sure it's not too hot (you don't want to cook the egg) then add 2 eggs and beat by hand until well incorporated.  Stir in crystallized ginger.
5. Pour evenly into the prepared pan and bake at the center of a preheated oven for about 25-35 mintues or until it looks similar to a cooked brownie... more firm on the outside and firm but softer in the center.  A toothpick should come out clean and the center shouldn't be too wet.  Cut it a bit with a knife if you have to... this doesn't cook like a cake but more like a brownie.
6. Cool completely before frosting.
7. To make the frosting, beat cream cheese and butter with an electric mixer.  Add vanilla and cream and beat again.  Finally, beat in sugar until combined then turn to high and beat until smooth and creamy.
8. Spread evenly over the cake with a knife or a spatula and sprinkle with walnuts if desired.  Serve at room temp or chilled.  Enjoy!


Friday, December 28, 2012

Coconut Pineapple Sponge Cake

My inlaws came out to visit for Christmas this year and I know my father in law loves anything with coconut and pineapple.  For him, I made this amazing cake.  It is a delicious grain-free cake recipe using fresh pineapple as a filling and topping for this moist coconut sponge cake.  Originally I served this chilled which was a mistake.  The cake is much tastier at room temperature.  You could store it in the refrigerator and them bring to room temperature before serving, but of course mine didn't last that long.  It was gone within 24 hours.  So tasty.  Enjoy! 

Fresh coconut and pineapple makes all the difference in the world in this moist tender cake

Ingredients:
3/4c coconut flour
1tsp baking powder
1/4tsp ground sea salt
6 eggs, yolks and whites separated
1c extra fine baking sugar
1tbs vanilla extract (do not use imitation vanilla)
1 large pineapple, cored and finely chopped
3/4c extra fine baking sugar
1/2c water
1/2tsp unflavored gelatin

Frosting:
1c butter at room temperature
2 1/2c confectioner's sugar
2tsp vanilla extract
2tbs full fat coconut milk
1c shredded sweetened coconut

Directions:
1. Preheat oven to 375F.  Line 2 - 8 inch cake pans with greased parchment or nonstick foil.
2. In a large bowl, mix together coconut flour, baking powder and salt.  Set aside.
3. Whisk yolks in a small bowl with vanilla.  Set aside.
4. Use an electric mixer and beat the egg whites in a large bowl until frothy.  Add 1c sugar and continue to beat until whites are shiny and hold stiff peaks (this could take a while, be patient and check them by turning off the mixer and pulling it straight up.  If the peaks hold the whites are done).
5. Fold in yolks gently into the whites.  Then gradually sift the flour mixture into the egg mixture and fold gently until completely combined.  Divide batter into the 2 pans and evenly spread with a spatula.
6. Bake 10-20 minutes or until the tops are golden and a toothpick comes out clean.  Allow to cool completely and then remove from pans.
7. Meanwhile, make the pineapple filling:  In a large saucepan, bring pineapple, 3/4c sugar, and water to a boil over medium high heat.  Reduce heat to a steady simmer and cook for 20-30 minutes or until the liquid is reduced and looks like syrup.  Stir in 1/2tsp gelatin.  Boil a few more minutes until dissolved.  Remove from heat and cool a bit.  Then place mixture into a food processor and blend until it is thick and pulpy but not completely smooth.  Transfer to a bowl and chill until at room temperature or a bit cold.
8. To make the frosting: Use an electric mixer to beat butter and powdered sugar until grainy.  Stir in vanilla and coconut milk.  Beat again on high until thick, creamy, and a bit fluffy.
Finished product; yum!
9. To make cake:  Place the first layer of cake on a cake stand or serving plate (place it upside-down).  Spread with about 3/4c pineapple mixture leaving a 1/2 inch border around the cake.  Top with the second layer turned upside-down so that the bottom of the cake faces up.  Press down gently.  Start at the top and spread a thin even layer of frosting over the top of the cake and then move to the sides.  Go through and put a second thicker layer over the entire cake.  Make a wide shallow indention on the top of the cake so that a ridge forms all along the top edge.  Press the shredded coconut onto the top and sides of the cake and spread about 1/2c of pineapple filling into the top indention.  See picture for what final result should look like.
10.  Serve at room temp for best result.  Enjoy!


Monday, December 17, 2012

Dark Chocolate Peppermint Flourless Cake

This flourless dark chocolate cake has a rich peppermint-chocolate icing that is absolutely irresistible.  I added crushed candy canes and sprinkled them on top for the holidays, but the decoration is optional of course.  You could also dust the top with powdered sugar and arrange an assortment of berries on top and serve with fresh whipped cream.  Rich, moist, and surprisingly light, this cake is sure to make any chocolate lover's dreams come true.  This cake is perfect for the holidays because it is so decadent, but is also gluten free, grain free, and guilt free.  Hey, it is the holidays after all!  Live a little!

So good Anthony snuck a piece before I could even get a picture!


Ingredients:
A little slice of chocolate heaven
1 1/2c almond flour
1c semisweet chocolate chips (I used Ghirardelli 60% cocoa)
3/4c fine granulated bakers sugar
6oz butter (1 1/2 sticks), room temp or softened
6 large eggs, whites separated
1/8tsp salt
1tsp lemon juice
1/2c heavy cream
1tsp pure peppermint extract
1c semisweet or dark chocolate chips
3 or 4 candy canes, crushed (optional)
Berries & Whipped Cream for serving (optional)

Directions:
1. Preheat oven to 375F.  Adjust a rack to the upper third.  Line the bottom of a 9" spring form pan with nonstick foil.  
2. Place 1c chocolate chips in the top of a small double boiler over simmering water (I used a glass bowl over a small saute pan filled with 2" of water).  Stir until almost melted.  Remove from heat and continue to stir until completely melted and smooth.  Set aside until just barely warm.
3. In a large bowl, warm butter slightly in the microwave if it's cold.  Add 1/2c sugar and beat using and eclectic mixer until the butter and sugar is soft and smooth.  Add egg yolks and beat until smooth (scrape the sides of the bowl to ensure it's all mixed in well). 
4. On low speed, add the melted chocolate until mixed.  Then add the almonds and beat until fully mixed.
5. Place the whites in a large separate bowl.  Add the salt and lemon juice.  Beat with the electric mixer (with clean beaters), starting on low and increasing gradually.  When the whites barely hold a soft shape, add in the last 1/4c sugar.  Then, on high, continue to beat until stiff peaks form (lift the beaters and if a straight point stays where the beaters are raised, they are done).  Try not to overbeat.
6. Stir 1 large spoonful of the egg whites into the mix.  Then in 3 parts, fold in the remaining egg whites.  Do not thoroughly mix until the last addition to keep from handling more than necessary (you don't want the egg whites to fall or the cake will be too dense).
7. Pour into prepared pan.  Level the batter and bake in the top third of the oven for 20 minutes.  Then reduce temperature to 350F and bake an additional 30-45 minutes.  The cake should come out clean when a toothpick is inserted.  The top of it may be cracked or sunk in a bit, this is all fine.
8. Remove and loosen pan.  Take out of pan completely and let cool on a plate.  Line the bottom of the cake with strips of parchment or foil so it's easy to frost.
9. To make the frosting, heat cram in a medium sized saucepan over medium high heat.  When it starts to bubble, stir in 1c chocoalte chips and 1tsp peppermint until smooth.  Turn off heat and stir occasionally until slightly thick.
10.  When the icing is barely warm (about 10 minutes later), pour over the cake and spread with a spatula.  Spread a bit over the sides.  Remove the foil.  Sprinke the top and sides with crushed candy canes if desired.  Store in the fridge.  Enjoy with berries and whipped cream or all by itself.


Wednesday, March 7, 2012

Grainless Coconut Cake

Okay I have a confession:  When I made my Paleo-ish Carrot Cupcakes I made WAY too much frosting (don't worry I scaled down the ingredient list so you won't do the same).  Of course it would be blasphemy to throw out a perfectly good bowl of icing so I decided to make one last dessert:  Coconut cake.  I just added some unsweetened shredded coconut to the cream cheese icing and, viola!  Coconut Icing.  Be careful when you put this one in the oven and stay close by: it tends to go from underdone to overdone very quickly.

Rich and moist cake with a creamy frosting:  delish!
Ingredients:
2/3c coconut flour
3/4c shredded unsweetened coconut
5 large eggs
1/2c pure maple syrup
1tbs vanilla extract
1/2tsp baking soda
1/4tsp salt
1/2c coconut oil, melted

Coconut Cream Cheese Frosting:
8oz full fat cream cheese at room temp
1/4c organic butter at room temp
1c powdered sugar (*alternatively use 1/3c maple syrup...your icing will be much softer but still delicious)
1/2tbs vanilla extract
1tbs coconut milk, to thin if needed
pinch salt
1/2c shredded unsweetened coconut

Directions:
1. Preheat your oven to 325F.  Line the bottom of a 9" springform pan with nonstick foil for easy clean up.
2. Using a hand mixer, beat eggs, maple syrup, vanilla, baking soda and salt.  Continue to beat while slowly pouring in melted coconut oil.
3. Mix in coconut flour and shredded coconut.  Beat for about a minute:  give it enough time for the coconut flour to expand and your batter will become thicker.
4. Pour the batter into your cake pan and bake for 25-35 minutes.  The cake is done when a toothpick inserted into the center comes out clean and the top is golden.
5. Cook completely before frosting.
6. To make the icing:  beat your cream cheese and butter until combined.  Add you sugar, vanilla, and salt and continue to beat until fluffy.  If needed, add a bit of coconut milk to thin it out.  Stir in shredded coconut at the end.  Frost immediately and store in the fridge.  Coconut heaven!

Tuesday, November 22, 2011

Pumpkin Cheesecake with Pecan Hazelnut Crust

I started my Thanksgiving baking and cheesecake is the perfect dessert to make ahead of schedule because it keeps well in the fridge and even freezes nicely.  This recipe is refined sugar and gluten free, but no one will be able to tell the difference.  I make a hazelnut pecan crust with a mostly cheesecake topping.  Just a hint of pumpkin takes this traditional dessert to a holiday dish.  Rich, elegant, and delicious.  Enjoy!

So delicious it's sinful
Pecan Hazelnut Crust Ingredients:
3/4c hazelnut meal
1c chopped pecans, processed in a food processor until flour-like consistency
pinch sea salt
4 1/2tbs melted butter

Pumpkin Cheesecake Filling Ingredients:
4-8oz packages full fat cream cheese at room temp (very important!)
So delicious Anthony had this for breakfast!
1/3c agave nectar
1/4c sour cream at room temp (optional)
2tbs coconut flour (optional)
1-15oz can pumpkin puree
2tbs pumpkin pie spice
1tbs vanilla extract
1/2tsp salt
4 large eggs at room temp


Directions:
1. Preheat your oven to 350F.  In a large bowl, mix hazelnut meal, pecan meal, salt and butter.  Press into the bottom of a 9" springform pan with your fingers and bake in the oven for 10 minutes.
2. Meanwhile, in a large bowl, beat cream cheese and agave nectar on low speed.  Mix in flour, if using (do not overmix).  Add pumpkin puree, pie spice, vanilla, and salt.  Mix until smooth.  Add eggs one at a time, mixing until each is combined.
3. Pour filling into the springform pan and gently smooth the top.  Place in the oven, turn oven temp down to 300 and bake for 45 minutes.  Turn off the oven and let the cheesecake sit for 2 hours (do not open the oven at all during this entire process!).
4. Remove, cool, cover, and place in the fridge overnight.

Tuesday, September 13, 2011

End of Summer Cobbler Cake


We are at that point in the year  it's not quite cool enough to embrace fall but still warm enough that you aren't ready to let go of summer.  So, to embrace the end of summer I made a summer fruit cobbler cake.  This cake is soft, and moist with seasonal sun ripened fruit on top.  Because the cake is only slightly sweet, I always serve mine warm with vanilla ice cream. 


Don't give up on the fruits of summer just yet!


Rich moist cake with a caramelized fruit topping:  perfect end of summer dessert
Ingredients:
3/4c sorghum flour
1/2c millet flour
1/2c tapioca starch
1c packed brown sugar
1tsp baking powder
1/2tsp sea salt
1 tsp xanthan gum
4tbs butter, melted
2 eggs, room temperature
2/3c buttermilk, room temperature
1/4tsp white balsamic vinegar
1tbs vanilla extract
1tbs raw agave nectar
1c strawberries, stemmed and halved
1 peach, cored and sliced
Granulated sugar, to toss fruit in
Raw sugar, to sprinkle on top

Directions:
Fruit arranged and ready for the oven
1. Preheat oven to 350F.  Using a 9" springform pan, line the bottom with parchment paper.
2. Mix together flours, starch, brown sugar, baking powder, sea salt and xanthan gum.
3. Add in butter, eggs, milk, vinegar, vanilla extract, and agave nectar.  Beat until smooth.
4. Pat fruit dry and sprinkle with granulated sugar.
5. Pour batter into the pan and spread evenly.  Arrange fruit on top.  Sprinkle with raw sugar (makes a nice crunchy topping).  Bake until a toothpick inserted into the center comes out clean (about 45 minutes).  Serve warm with ice cream.


Serve warm out of the oven with your favorite vanilla ice cream!

Friday, September 9, 2011

Pineapple Upsidedown Coffee Cake, Gluten Free Style

Anthony LOVES my original Pineapple Turn A Frown Upside-down Coffee Cake but he has not been able to eat it since going gluten free about a month ago.  So, I was determined to use my traditional recipe to reconstitute a gluten free version.  I am so glad I did!  The cake is amazing:  rich, moist, and delicate with a hearty brown sugar pineapple crust.  Yes, this recipe is one of those "pure indulgences" that isn't even the smallest bit healthy.  But, hey, everyone deserves a little dessert!  ... and did I mention it's DELICIOUS?!?! 


I serve mine warm with vanilla ice cream
Ingredients:
 1 stick butter for topping + 1/2 stick butter for cake
1c brown sugar for topping + 1/2c brown sugar for cake
1 or 2 cans pineapple rings in juice (reserve 1/2c juice)
2c Pamela's Gluten Free Baking Mix
2tsp baking powder
1/2tsp baking soda
3/4tsp fine sea salt
3 large eggs
1/2c granulated sugar
1tbs vanilla extract

Directions:
1. Preheat oven to 350F.  Line a 13x9" pan with parchment or nonstick foil.  Pat pineapple rings dry with a paper towel.  Meanwhile, heat 1 stick of butter in a saucepan over low until melted.  Add 1c brown sugar and stir, raising the heat to medium until boiling.  Pour into the bottom of a 13x9 inch pan and place pineapple slices in a single layer on top.  Let cool slightly while you put together the cake batter.
2. Mix dry ingredients together and set aside.  Beat together 1/2 stick butter with 1/2c brown sugar and 1/2c granulate sugar until combined.  Add eggs and vanilla.  Continue to beat.  Add 1/2 of the dry mix and beat, then add 1/2c reserved pineapple juice and finish with the last of the dry mix.  Continue to beat 2 minutes or until combined and very smooth.
3. Carefully pour batter over the prepared pan and spread evenly.  Bake in the center of a preheated oven for about 30-40 minutes, or until the top is golden brown and a toothpick inserted into the center of the oven comes out clean.  Let cool for 2 minutes only and then invert the cake onto a serving tray.  Continue to cool for a few more minutes.  I like to serve mine warm with ice cream but it is also delicious chilled or at room temp.

Tuesday, September 6, 2011

Gluten Free Blueberry Cake with Cream Cheese Icing

The smell of fresh blueberries in the oven is the only motivation I needed to make this delicious cake.  It is so moist, make sure you cool it completely to room temperature before serving or it tends to fall apart. 


A moist almond cake with sweet blueberries and a delicate icing
Cake Ingredients:
1 stick + 3tbs butter, softened
3/4c granulated sugar
3 eggs
a little less than 1/2c sour cream
1c almond flour
a little less than 1/2c white rice flour
2tsp baking powder
1tbs vanilla extract
1c fresh or frozen blueberries (remember if using frozen, the cooking time will be a bit longer)

Icing Ingredients:
8oz cream cheese, room temperature
1/4c sour cream
1/2 stick butter, room temperature
1c confectioner's sugar
juice of 1/2 lemon
1tsp vanilla extract

Directions:
1. Preheat your oven to 350F.  Line a springform pan with parchment at the bottom and butter it.
2. Mix butter, sugar, sour cream, vanilla, and eggs with a mixer.
3. In a small bowl, mix together flour and baking powder.
4. Pour the dry ingredients into the wet (but leave behind a bit of flour in the bowl).  Mix together until combined.
5. Toss the blueberries with the bit of flour left in the bowl.  Then gently fold them into the batter.
6.  Pour the batter into the prepared pan, spreading evenly.  Bake for about 30 minutes or until the cake is browning on top and a toothpick comes out clean (every oven and location is different - watch your cake closely!).  Let cool.
7. To make the icing, mix all ingredients together until smooth and whipped.  Spread on top of the cooled cake and serve.

Wednesday, August 31, 2011

Gluten Free Peach Coffee Cake

This recipe is a blend of a peach cobbler and a coffee cake:  delish!  Make this recipe when peaches are ripe and in season.  Serve this warm from the oven with vanilla ice cream on top.  A perfect summer dessert. 

Peach coffee cake begging for some vanilla ice cream

Ingredients:
1c sorghum flour
1c light brown sugar
3/4c almond meal
1/2c tapioca starch
2tsp baking powder
1tsp xanthan gum
1tsp ground cinnamon
2 large eggs, beaten
1/4c extra virgin coconut oil
2tsp vanilla extract
5-6tbs milk or soy milk, as needed to think the batter
3 peaches, sliced

For the streusel topping:
1/3c light brown sugar
3tbs brown rice flour
3tbs extra virgin coconut oil
1/3c chopped pecans
1tsp ground cinnamon


Directions:
1. Preheat your oven to 350F.  Line the bottom of an 8 or 9" cake pan with parchment paper (I used a springform pan)
2. Whisk dry ingredients in a bowl: sorghum flour, sugar, almond meal, baking powder, xanthan gum, and cinnamon. 
3. Add in beaten eggs, oil, vanilla, and 2tbs milk/soy milk.  Beat to combine.  Add more milk a tbs at a time and beat after each addition until the batter becomes loose and smooth (will be thicker than normal batter!).
4. Press batter into the cake pan using damp hands.  Press peach slices on top.
5. Make streusel: Combine sugar, flour, coconut oil, pecans and cinnamon.  Mix until combined and sandy looking.  Sprinkle evenly on top of cake.
6. Bake in the center of the oven for about 40 minutes, or until cake is set and a wooden pick emerges clean.  If the top browns too quickly, cover it with foil and continue baking.  Served warm from the oven with some vanilla ice cream is my preference.  Enjoy!

Monday, August 22, 2011

Dark Chocolate Fudge Cake with Raspberry Drizzle and Fresh Whipped Cream

It must be obvious by now:  I love chocolate.  This cake is sure to cure any chocolate craving with it's rich velvety texture and moist crumb.  The almond flour produces a sturdy cake that only gets better as it sits overnight.  I topped mine with a fresh raspberry drizzle and whipped cream to add a pop of flavor.  It is truly a decedent cake experience.  And, yes, it is gluten free.

Warm from the oven or chilled overnight:  the ultimate chocolate experience


Ingredients:
12oz bittersweet chocolate (I used Ghirardelli Bittersweet Chocolate Chips)
1 1/2 sticks unsalted butter, cut into chunks
1tbs vanilla extract
7 large eggs
3/4c packed light brown sugar
1/4c organic blue agave nectar
1/3c white granulated sugar
1/4c unsweetened cocoa
1/2c + 2tbs almond flour

To serve:
Fresh berries
Berry sauce
Fresh Whipped Cream

Directions:
1. Preheat oven to 350F.  Line the bottom of a 9" springform pan with parchment paper.
2. Place the chocolate and butter in a glass or metal bowl over a sauce pan filled with 2" simmering water.  Stir until chocolate mixture is melted.  Remove from heat and cool slightly (but keep stirring occasionally to make sure it stays smooth).
3. Using an electric mixtr, beat the eggs in a large bowl until frothy.  Add all 3 sugars and beat until thick, pale in color and flows in ribbons, about 6-8 minutes with a hand mixer. 
4. Very very slowly pour about 1/2 of the warm chocolate mixture into the egg mixture while beating on low to combine.  Then mix the rest of the chocolate mixture by hand or with the mixer on low until just combined.  Add the vanilla and mix to combine.
5. Sift in the cocoa powder and almond meal and lightly stir until just combined.  Pour the batter into the prepared pan and cook for about 50 minutes or until a toothpick inserted into the center emerges clean with a few moist crumbs.
6. Cook the cake on a wire rack, run a knife around the edges of the pan and remove the outer ring.  Use a flexible plastic or rubber spatula to remove the slices of cake.  Top with raspberry drizzle and whipped cream.  Refrigerate the leftovers (even better the next day!).


To make the raspberry drizzle:  I warmed up a few cups of frozen raspberries over the stove with a few tablespoons water, then placed them in a food processor and processed until smooth.  I returned the sauce to the pan and added a little cornstarch in cold water to thicken the sauce and added granulated sugar to taste.

To make fresh whipped cream:  In a cold bowl, combine whipped cream, some vanilla extract, and a few tbs of granulated sugar.  Beat on low until combined and then on high until the mixture thickens and doubles in volume.  Add some dissolved, cooled gelatin if you want to to keep overnight (otherwise it will turn back into liquid).

Tuesday, August 2, 2011

Gluten Free Strawberry Coffee Cake

I finally convinced my husband to try a gluten free diet.  I have been following a "mostly" gluten free diet for the past 2 years, but I do occasionally go off the diet and eat quite a bit of wheat (there really is nothing better than a juicy burger or some fresh-out-of-the-oven-pizza and beer!).  My best friend Marisa calls this "a gluten light diet."  I do not have Celiac Disease, but I have found that a gluten free diet gives me more energy, eliminates the stomach pain that I was plagued with my entire childhood, and allows me to sleep better at night.  Since my husband cannot live without desserts, I finally decided to try a gluten free concoction that turned out very much like a coffee cake.  We both had a huge slice served with double vanilla ice cream on the side and I pretty much couldn't be happier with the way this turned out.  If you are someone you love is gluten-free, this is a recipe you will want to keep.

Use raw sugar on top to bake a perfectly golden and crispy crust.


Serve with fresh sliced strawberries and double vanilla ice cream
 Ingredients:
16oz container fresh strawberries
1tbs fresh lemon juice
2tbs granulated sugar
2/3c cornmeal
1/3c Pamela's Ultimate Baking & Pancake Mix
2/3c white rice flour
2tsp xanthan gum
1tsp sea salt
1 1/2tsp baking powder
2/3 cup light brown sugar
1/2-3/4tsp cinnamon (can also add a dash of nutmeg if desired)
1/4c canola oil
1c buttermilk, warm (can substitute hemp/rice milk)
1/2tsp fresh lemon juice
3tbs agave nectar (can substitute honey)
2tsp vanilla extract
2 eggs at room temperature

Directions:
1. Preheat the oven to 350F.  Grease a 9 inch round cake pan or skillet with butter.  Warm skillet, if using. 
2. Stem strawberries, slice in half, and toss with lemon juice and sugar.  Set aside.
3. In a large mixing bowl, whilk together cornmeal, baking mix, rice flour, xanthan gum, salt, baking powder, baking soda, brown sugar, and cinnamon.  Set aside.
4. In a smaller bowl, mix together all wet ingredients (oil through eggs).
5. Pour the wet ingredients into the dry bowl and mix until just combined (don't overmix!). 
6. Drain strawberries and place most of them at the bottom of the pan.  Spoon better on top.  Wtih remaining strawberries, place on top cut side down and press into the batter.  Sprinkle the top generously with raw sugar.
7. Bake for 35-45 minutes, or until the cake is golden brown and firm on top and a toothpick entered into the center comes out clean.  Serve warm or at room temperature.  Wrap leftover slices in foil and freeze:  bring to room temperature before serving.

Dessert is served


Wednesday, July 20, 2011

Pineapple Turn-A-Frown-Upside-Down Coffee Cake

I am re-posting this recipe because it deserves it's own stand alone post.  I made pineapple upside down coffee cake for dessert this Memorial Day.   Anthony was in a terrible mood until I handed him a fresh piece of this homemade dessert.  He immediately smiled, apologized, and was in a better mood the rest of the evening... yea... it's that good... which is why I now call it "Pineapple Turn-A-Frown-Upside-Down Coffee Cake".  Everyone could use a recipe like this one!

This makes me want to run downstairs and eat another piece

Ingredients:
1/2c butter (1 stick)
1 cup packed brown sugar
12 canned pineapple rings in juice (need 2 cans, reserve 1/2c juice)
2c all purpose flour
2 tsp baking powder
1/2 tsp salt
1/2 tsp cinnamon (plus more for serving)
1/2 cup butter (1 stick)
1/2 cup packed brown sugar
2 eggs
1/2 cup milk
1 tsp vanilla
Whipped cream for serving

 Directions:
1. Preheat oven to 350F.  Butter the bottom and sides of a cake pan.  Line with parchment paper and butter again.  For pineapple topping, melt butter in a sauce pan over medium heat.  Add 1c brown sugar.  Stir frequently until boiling.  Pour into pan.  Drain pineapple rings (reserving juice).  Fit 12 rings at the bottom of the pan.
2. In a medium bowl, whisk flour, baking powder, salt and cinnamon.  In a large mixing bowl mix softened butter, brown sugar, and granulated sugar with a mixer for 2 minutes.  Add eggs and mix.  Beat in 1/2 of flour mix.  Beat in reserved 1/2c pineapple juice and milk.  Beat in remaining flour and vanilla.
3. Pour batter carefully over the pineapples in the pan and spread evenly.  Bake 35 minutes or until a toothpick inserted near the center comes out clean.
4. Cool on a wire rack for 10 minutes (any less and the pineapple with stick).  Place a baking sheet over the cake and invert.  Pull off parchment paper.  Serve warm with whipped cream and extra cinnamon if desired.

Sunday, July 10, 2011

Blueberry Lemon Money Bread

I have decided to divulge my secret recipe for blueberry lemon bread.  The first time I made this Anthony said, "You could make a lot of money with this bread" which is why I now call it my money bread.  Make this bread when blueberries are in season, or use frozen.  Frozen berries will require a little extra baking time so keep a close eye on the oven.  This bread tastes similar to a muffin with its rich moist texture.  The combination of the bite of the lemons with the sweetness of the blueberries is unsurpassed.  You will not be sorry you made this.


The best loaf of bread you will ever eat

Ingredients:
1 stick butter at room temp, plus more for pans
2 cups all purpose flour, plus more for pans
1 1/2c sugar
1 tbs finely grated lemon zest
1/2c + 2tbs fresh lemon juice (from 4-5 lemons)
3/4c heavy cream
1tsp pure vanilla extract
1/4tsp baking powder
1/4tsp baking soda
2 large eggs
1 1/4c fresh or frozen blueberries

Directions:
1. Preheat oven to 350F.  Butter a 9x5" loaf pan.  Sprinkle with flour and tap out excess.
2. Combine 1/2c sugar and 1/2c lemon juice in a small sauce pan.  Cook and stir over medium heat until sugar dissolves.  Set aside.
3. Combine heavy cream, 2 tbs lemon juice, and vanilla extract in a small bowl.
4. Whisk together flour, baking powder, baking soda, and 1/4tsp salt in a medium bowl.
Moist tart lemon bread with sweet blueberries
5. Beat butter, lemon zest and 1c sugar on medium until pale and fluffy.  Reduce speed to low and add eggs one at a time and beat thoroughly.  Beat in 1/3 of the flour mixture followed by 1/2 of the cream mixture and alternate beginning and ending with flour until all is combined.  Gently fold in blueberries with a spatula.
6. Immediately pour batter into the loaf pan and bake about 55 minutes, or until toothpick in the center comes out clean (will need about 5 more minutes for frozen berries and you may need to place foil over the pan 1/2 way through to keep the top from browning too quickly).
7. Brush the top of the cake with lemon glaze and let set 15 minutes.  Remove from pan and brush the remaining sides of the cake with the glaze.  Let cool completely and serve.  (also delicious warm with butter!)